Cleaning vinyl siding may not be at the top of your to-do list, but it plays a big role in keeping your house looking fresh and well-maintained. Over time, the siding can accumulate dirt, grime, mildew, and even the dreaded green algae. But don’t worry—cleaning your vinyl siding isn’t as daunting as it sounds! Whether you’re ready to tackle it yourself or call in professionals like home cleaning services Burnaby, let’s walk through on how do you clean vinyl siding on a house.
Why Cleaning Vinyl Siding Matters
Before we dive into the nitty-gritty of cleaning, let’s talk about why it’s important. Vinyl siding is popular because it’s durable, weather-resistant, and requires less upkeep than other materials like wood. However, it’s not maintenance-free. Your siding can build up dust, dirt, and mold over time, making your home look drab. Worse yet, if left unchecked, mold and mildew can damage the siding and reduce its lifespan. By cleaning your vinyl siding regularly, you’re not just boosting curb appeal; you’re protecting your home. And honestly, who doesn’t want to come home to a sparkling exterior?
The Best Time to Clean Vinyl Siding
The ideal time to clean your vinyl siding is during the spring or early summer. The temperatures are usually mild, and you’ll be able to spot any winter grime left behind by rain, snow, or storms. Avoid cleaning on extremely hot days, as the cleaning solution may dry too quickly and leave streaks. Also, don’t clean when it’s too cold, as the water can freeze, creating a slippery surface. With that in mind, if you’re ready to roll up your sleeves, let’s get started. Here are the steps to make your vinyl siding look like new again!
Step 1: Gather Your Supplies
Before anything else, you’ll need to gather the right supplies. The good news? You likely already have many of these in your home. Here’s what you’ll need:
- A soft-bristle brush or sponge
- Garden hose with a spray nozzle
- Bucket of warm water
- Mild detergent (dish soap works well)
- White vinegar (for a natural cleaner)
- A pressure washer (optional but handy for tough stains)
You can also buy special vinyl siding cleaners, but in most cases, a little soap and water will do the trick. If you don’t feel like taking on the task, there’s always home cleaning services Burnaby who can take care of it for you.
Step 2: Prepare Your Cleaning Solution
If you’re using a store-bought cleaner, follow the instructions on the label. However, if you prefer a DIY approach, mix a simple solution of 1/3 cup of dish soap, 2/3 cup of white vinegar, and a gallon of warm water. Vinegar is a natural cleaner that effectively kills mold and mildew, making it perfect for outdoor cleaning. Don’t use harsh chemicals like bleach. While bleach can be effective, it can also harm your plants and grass if it drips down from the siding. A mild soap solution is just as effective without the risk of damage.
Step 3: Rinse the Siding
Before applying your cleaning solution, give the siding a good rinse with your garden hose. Start from the top and work your way down to avoid streaks. This initial rinse will remove loose dirt and make the scrubbing easier.
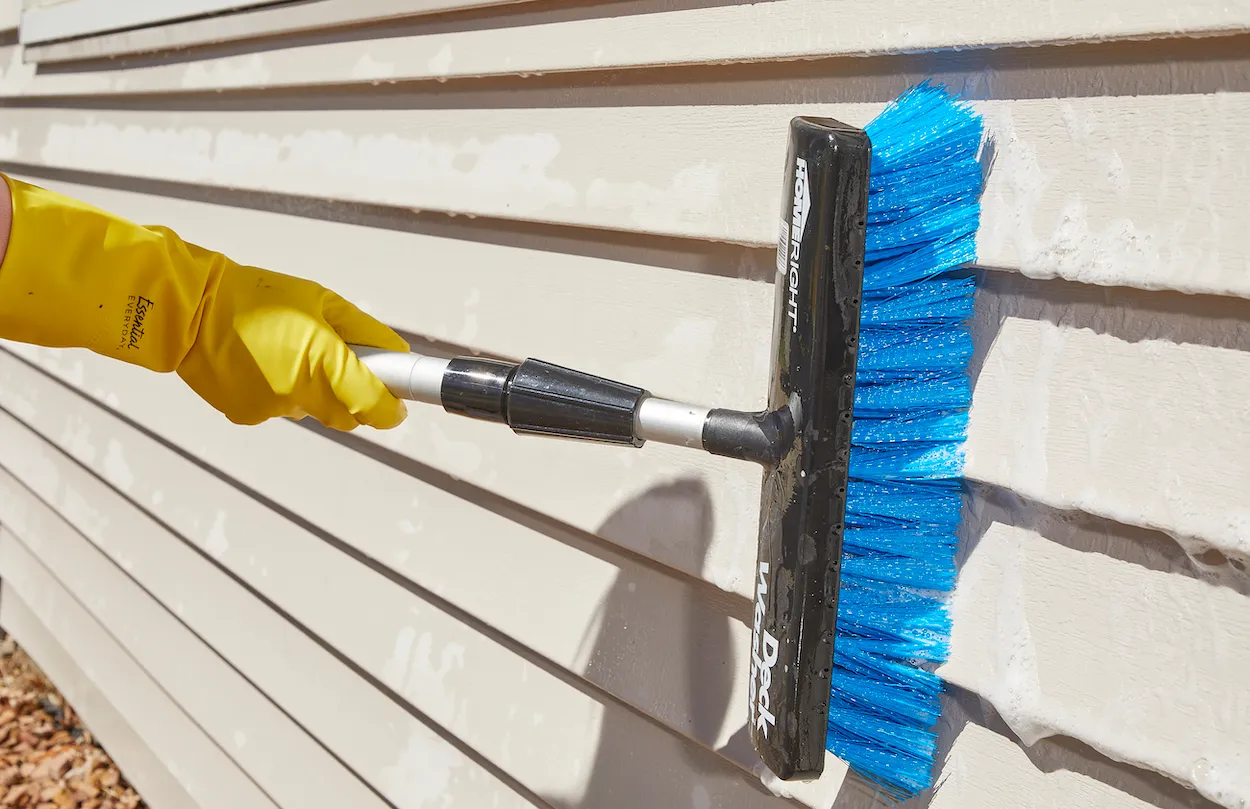
Step 4: Scrub the Siding
Now for the fun part! Use a soft-bristle brush or sponge to apply the cleaning solution to the siding. Be sure to work in small sections so that the soap doesn’t dry before you have a chance to rinse it off. Scrub gently to avoid scratching the vinyl, and pay extra attention to areas with stains or mildew buildup. If your home has stubborn stains, especially mold or mildew, you can use a mixture of one part vinegar to one part water for those specific spots. Vinegar is tough on mildew but gentle on your vinyl.
Step 5: Rinse Again
After scrubbing, it’s time to rinse. Once again, start at the top and work your way down, making sure all the soap is washed off. You don’t want any residue left on the vinyl as it can attract dirt and cause streaking. If you’re using a garden hose, make sure to use the spray nozzle at a moderate setting. Too much pressure could damage the siding, especially if it’s older.
Step 6: Drying and Inspecting
Once you’ve finished rinsing, let the siding air dry. Vinyl siding dries relatively quickly, but you might want to check for any water pooling around your home’s foundation. If you notice any stubborn spots or streaks after it dries, go back and touch them up with your brush and cleaner. It’s also a good time to inspect the siding for any damage. Look for cracks, gaps, or loose panels that may need repair. Catching these problems early will help prevent more costly repairs down the road.
Step 7: Power Washing (Optional)
If you have a large house or heavy buildup on your siding, you may want to consider using a pressure washer. Power washing can speed up the process, but it’s important to be careful. Too much pressure can damage the vinyl or cause water to get behind the siding, leading to mold and moisture issues. If you do use a pressure washer, keep the pressure under 2,500 PSI and stand at least 3-4 feet away from the siding. Aim the spray at a 45-degree angle and move in a sweeping motion from top to bottom. Avoid spraying directly into seams or gaps. Not comfortable with pressure washing? No worries—this is a great time to call maid service Burnaby to handle the job professionally. They know how to safely clean vinyl siding without damaging it.
Keeping Vinyl Siding Clean: Maintenance Tips
Now that your siding is spotless, here are some tips to keep it looking fresh longer:
- Regularly rinse your siding with a garden hose to prevent dirt from accumulating.
- Trim plants and bushes around your home to avoid dirt splashing up onto the siding during rain.
- Check your gutters to ensure they’re not leaking or overflowing. Water spilling from gutters can lead to mold and mildew on your siding.
- Remove debris like leaves and sticks that might gather near the base of your home, which can cause dirt to splash up.
- Schedule a cleaning every 1-2 years, or as needed, depending on the climate and weather conditions in your area.
Why Consider Professional Help?
If cleaning your vinyl siding seems like a lot of work or if your house is just too large to tackle on your own, hiring professionals might be the best option. Services like home cleaning services Burnaby specialize in exterior home cleaning and can save you a lot of time and effort. Plus, they come equipped with the right tools, including professional-grade pressure washers, to get the job done quickly and effectively. Professionals can also spot any issues with your siding, such as cracks or mold, before they become bigger problems. It’s a small investment in keeping your home looking great and extending the life of your vinyl siding.
Want to know “How to Clean Outside Windows You Can’t Reach?” visit our blog page today!
Final Thoughts
Vinyl siding is a fantastic, low-maintenance option for your home, but it still needs a little TLC from time to time. With the right supplies, a bit of elbow grease, and some care, you can make your siding look brand new. And if you don’t have the time—or the energy—there’s always home cleaning services in Burnaby to take care of it for you. So, whether you’re gearing up for a DIY weekend or thinking about calling in the pros, you now know how to keep your vinyl siding in tip-top shape! Happy cleaning!
Ready to give your home a fresh, clean look? Let ProClean handle your vinyl siding with expert care, saving you time and effort while delivering sparkling results. Reach out to us today to schedule your professional siding cleaning and enjoy a spotless home exterior without the hassle!
[/fsn_text][/fsn_column][/fsn_row]